edge is 1/6 inch above the wick tube, then release
104. Care of Heater When Not in Use
indicator pointer.
a. When the heater is not to be used for several
months, (carefully drain to prevent rusting. To make
103. Cleaning Heater Units
sure that no water remains in the heating unit unscrew
a. Operating the heater with too high a flame will
the pipe connections at the lower part of the heater.
cause the heating units to be covered with smoke and
Unscrew the cap at end of oil feed line and drain.
soot. This results in a great reduction in efficiency.
b. Should heater not produce hot water
Clean the heating units as well as the burner parts
satisfactorily, examine all piping to see that it is
thoroughly, and remove all soot.
arranged properly.
b. The heater casing can be easily raised for
cleaning or inspecting.
Caution
Do not place combustible material on
c. When cleaning the heating units, be sure to
cover the burner to protect it from falling soot.
the heater, or permit such material to
accumulate around heater. If heater
is not connected to a flue be sure
that flue connection opening in top
of heater is always open so heat can
pass through.
Section XIII. INTERNAL BELL RINGER ASSEMBLY
to 1.000 inch diameter plus 0.001 inch maximum, minus
105. Bell Ringer
0.000 inch minimum and the hardened and ground
a. Remove ringer from bell and clean thoroughly,
piston is 0.9990 inch minimum, 0.9998 inch maximum
removing all traces of dirt and gum.
at port end. If repairs are made, body can be reamed
If piston shows excessive wear, repairs to ringer are
and burnished to 1.025 inch diameter plus 0.001 inch
required.
maximum, minus 0.000 inch
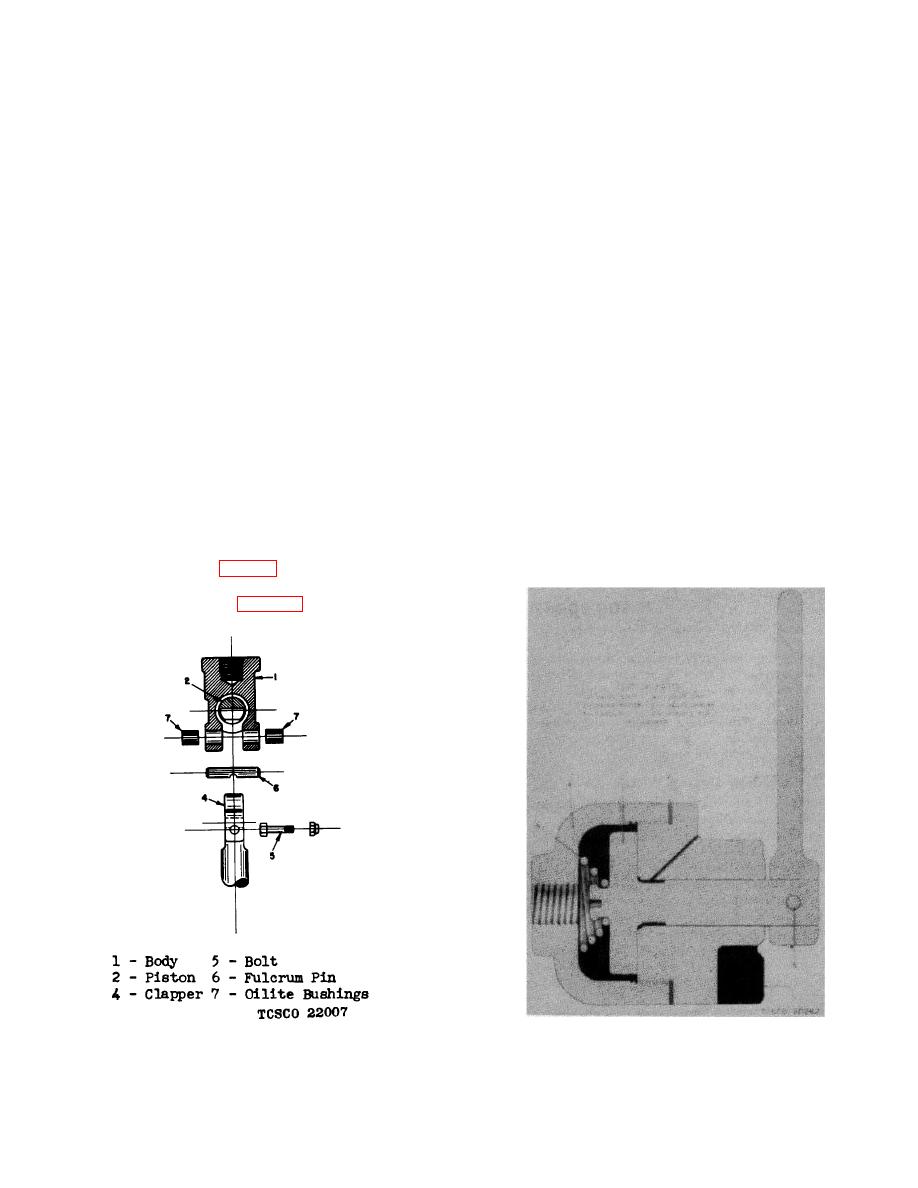
push out fulcrum pin (6). Slide out piston (2) and
remove cap (3), shown on figure 3. The original body
bore is reamed and burnished
Figure 39. Bell ringer operating valve.
Figure 38. Bell ringer sectional view.
66


